
Smooth BD (Patch Explained)
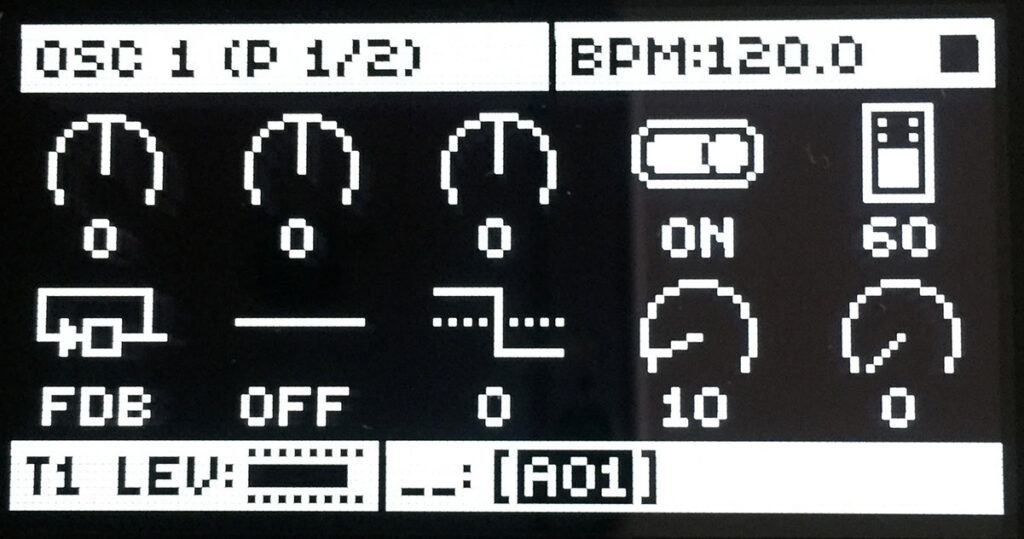
Oscillator 1 settings
1/ You can see Level: 60. Set it to the same on OSC2 and you can figure out this value later. Set the OSC1 in feedback mode. Level: 0 and come back on this one later. We can think about this way of working as a process when thinking about the bass drum.
Oscillator 2 settings
2/ You should get used to using a triangle wave and filtering as a way of getting the sinewave for OSC2. Remember OSC2: TRI

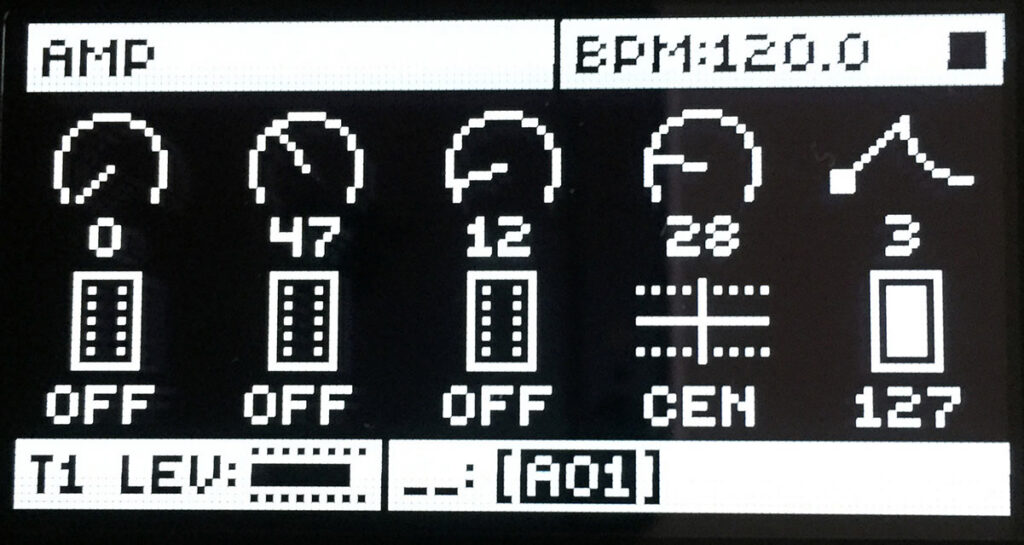
Amp Envelope settings
3/ We shape how sound is so it sounds like good timing to discuss the kick drum shape number. When you think of kick drum think of shape number: 3 ; medium decay, short decay, short release.
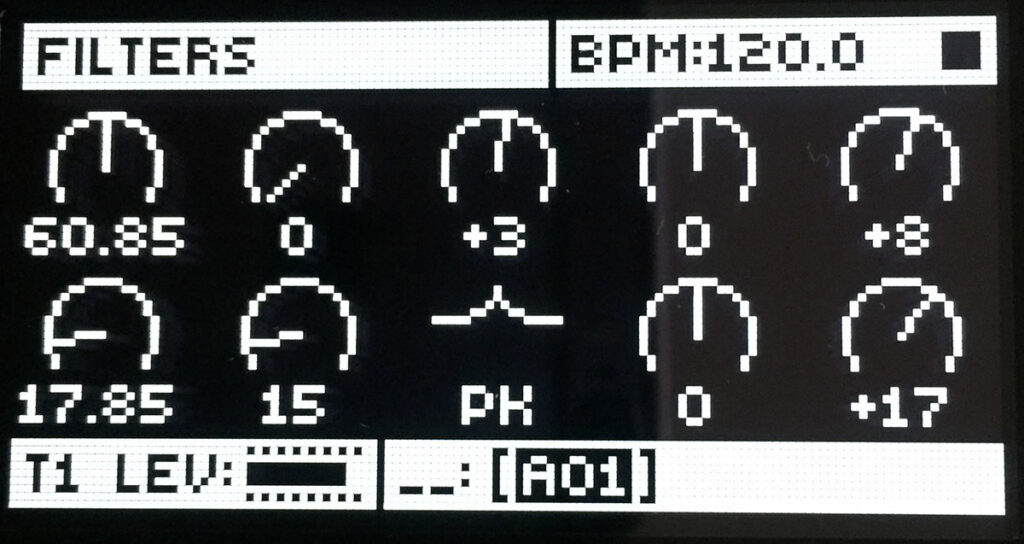
Filter settings
4/ Remember why we use the peak filter ? We use the peak filter because it acts like an EQ. With the peak filter can then boost some frequencies. At this point you may adjust your settings depending on the note programmed for the sequencer. Another thing to consider is if you work with OSC in fixed frequency mode. The subtractive part of the sound is removed by Ladder Filter (F1) FRQ: 60,85
A little bit of overdrive +3 if you are on the Analog Four mark one try -3 instead. Filter Envelope, respectively +3 and +17
Filter Envelope settings
5/ Model shape is set to number 11 and add a little decay: 43
Note: On Drums and Percussions you may find easier to work with only decay and release on some sounds – the sustain may be irrelevant or less important than other sounds.

Envelope 2 settings
6/ You should know now what modulation destination we’ll choose to activate here. Which modulation destination should we use? Yes Pitch modulation PM2: +27
And shape 11, decay: 16

Oscillators option page
7/ I will do something different here by cumulating PM2 and BEND + SLI settings. Who says I shouldn’t that ? Sometimes you will read contradicting statements from other synthesis books but you need to trust me here. So OSC retrig: OFF
BND: +15 and SLI: -17

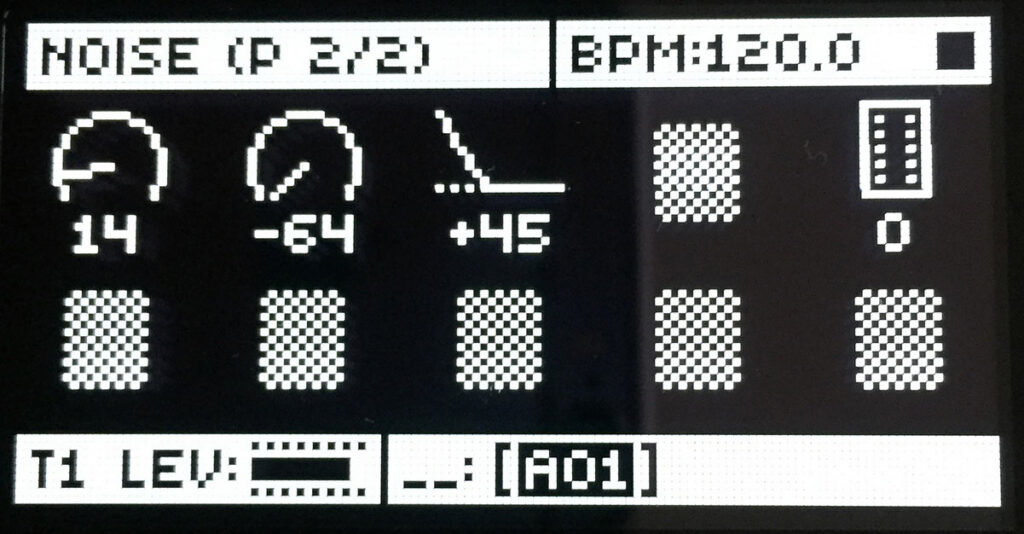
Noise page
8/ You may want to add a little bit of noise on the Attack portion of the sound. (just put the level up to your taste. Remember to start small first because there is a less likelihood that the noise will contradict other sounds in your compositions.
What we can do from here ?
Well harmonics and processing are both great concepts to master. It is a matter of music genre and what you think well suited for a particular track. Like any audio production concepts you’ve learned try it on your tracks or try it on another person’s track. You will get the hang of it with practice. Do you want a deep and house kick, or a hard hitting compressed and distorted kick ? Yes I am using two extremes here, but this is the passive voice you should be listening to in your head.
Harmonics can be injected with the Analog Four tools. To my taste I would go with External processing of making harmonics for the Kick. This is to shape it exactly how I want it to be and to make it work in the context of a particular track. I think with the Analog Heat in your signal chain, it might even be better to design the kick with the Analog Rytm. Using Overbridge, exporting this from the Analog Four to the DAW and going further with processing. Then you can run the sample and export back into the Octatrack or the Rytm. It’s up to you ! But if it works right out the box for you it’s perfectly fine. If you want to just run the sample you made into your DAW that works too.

